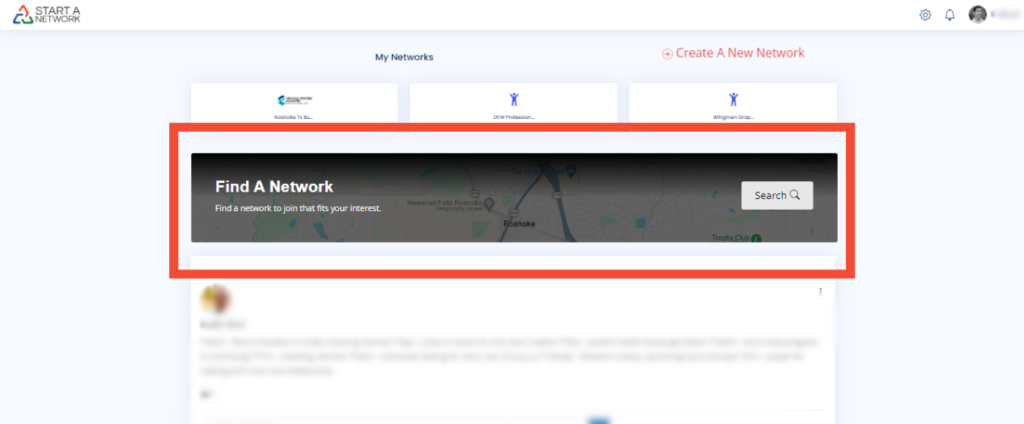
Access the “Find a Network” Feature
- Head over to your network homepage.
- Locate the “Find a Network” option just below your existing networks.
- Click “Search” to begin exploring available networks.
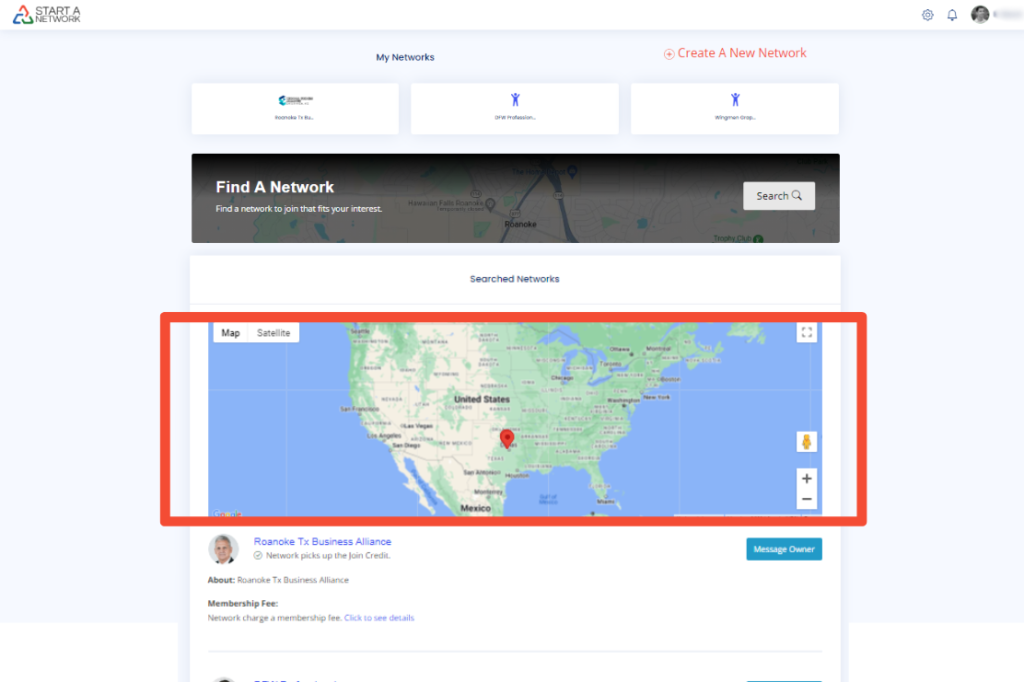
View Nearby Networks on the Map
- A Google Map will appear, displaying networks in your area.
- If there are no networks nearby, you’ll see a list of all available networks instead.
- Want to create your own network? Check out the Regional Business Alliances link in the description—where you can even get paid to run a network!
Understanding the Network List Details
Each network listing includes:
✅ Network Owner’s Profile Image
✅ Network Name
✅ Brief Overview
✅ Membership Fees (if any)
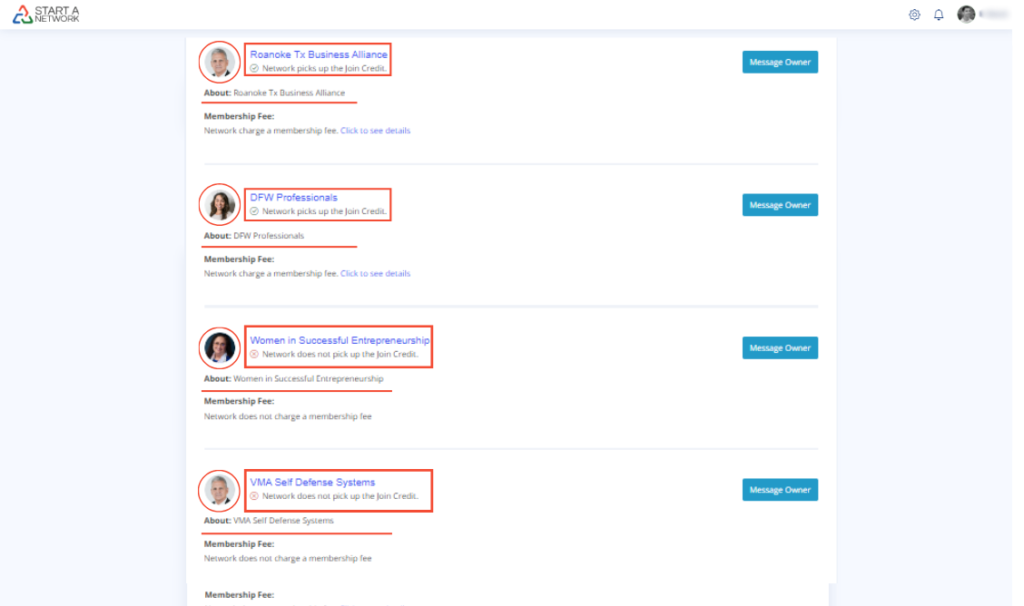
- Click the network name to visit their official website.
- Join Credits are required to join networks. Some Network Owners cover this fee as part of their membership, and this will be indicated in the list.
Checking Membership Fees
- The listing will show whether the network has a membership fee or is free to join.
- Click “See More Details” to view a breakdown of different membership levels and costs.
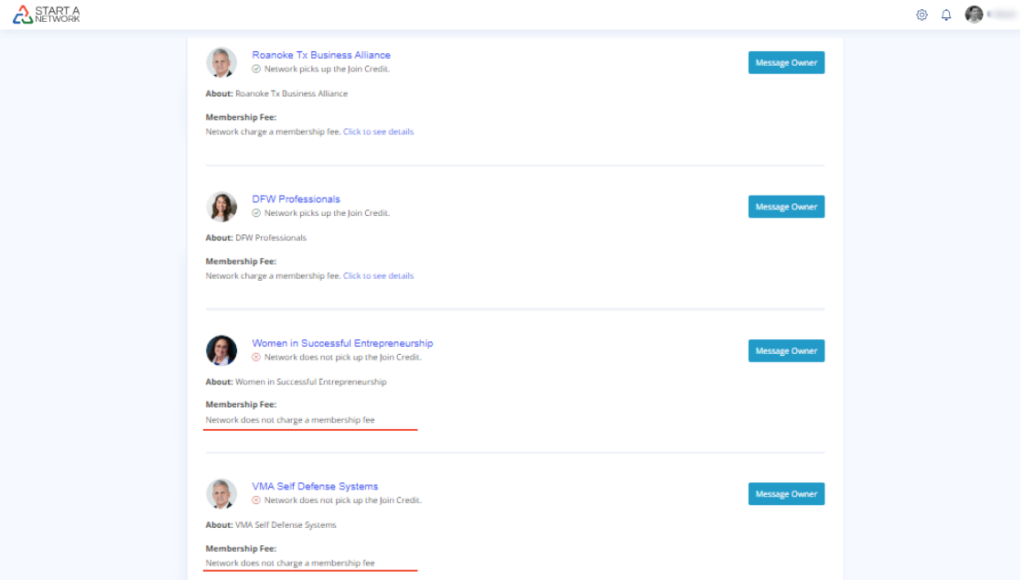
Contacting the Network Owner
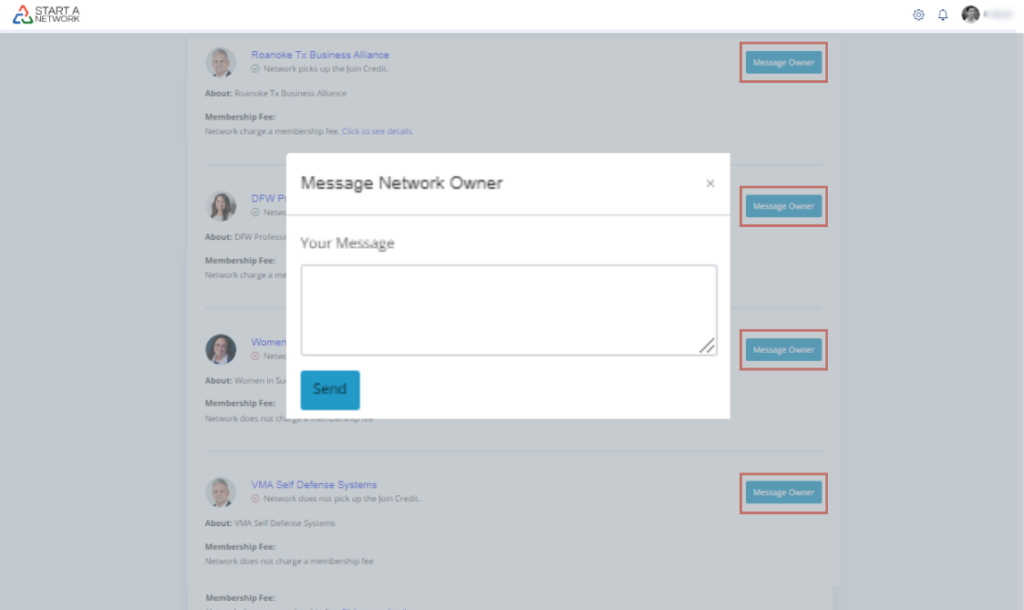
- Found the perfect network? Click “Message Owner” to reach out directly.
- Your message will automatically include your contact details and Master Profile photo—so ensure your profile is updated to make a great first impression!
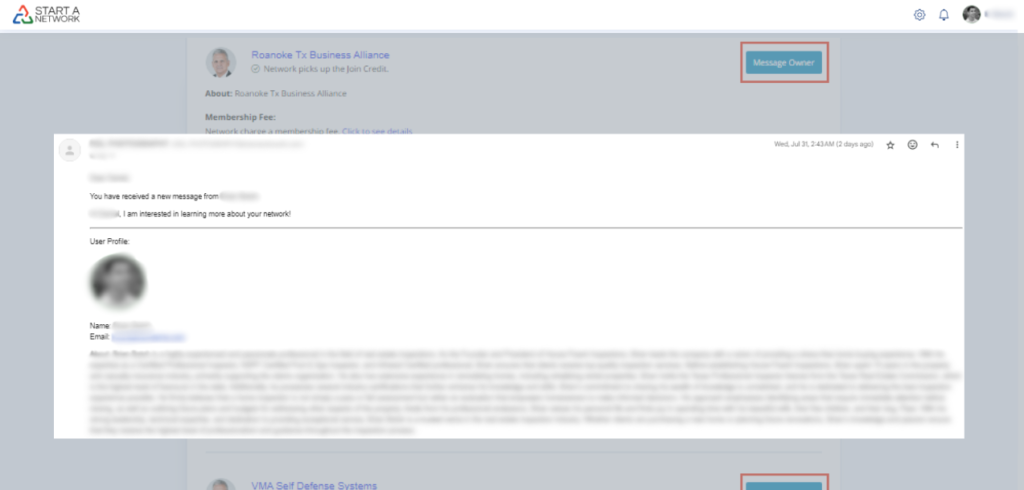
- You’ll receive a confirmation email with the network owner’s contact details.
For Network Owners:
- If someone sends an inquiry about your network, the message will be sent to the email address linked to your StartANetwork account.
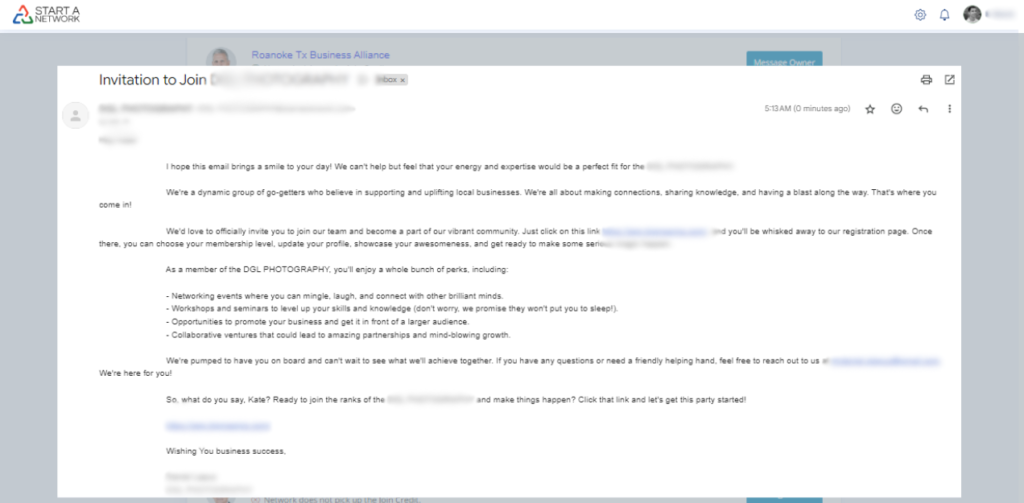
Accepting the Invitation & Joining
- Once you and the network owner agree that you’re a great fit, they’ll send you an invitation.
- Accept it, and you’re all set to start networking!