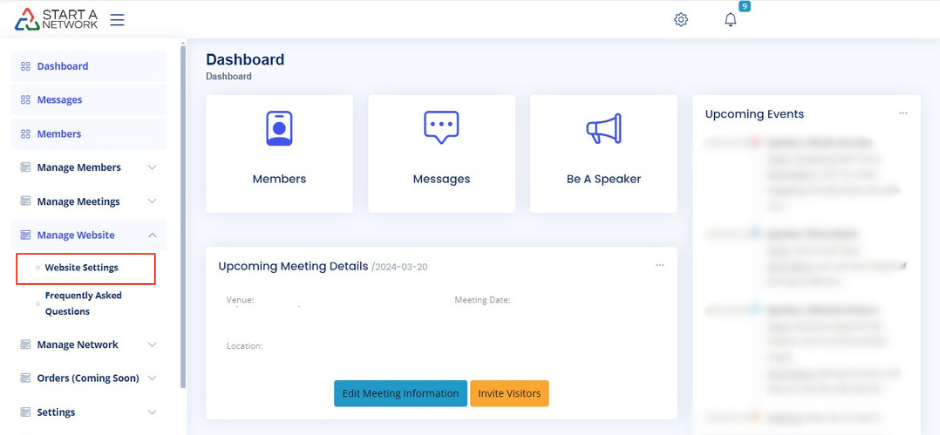
Access Website Content Settings
- Navigate to your dashboard.
- Expand the “Manage Website” menu on the left.
- Click on “Website Settings.”
- Scroll down until you locate the “Website Content Settings” portion of the screen.
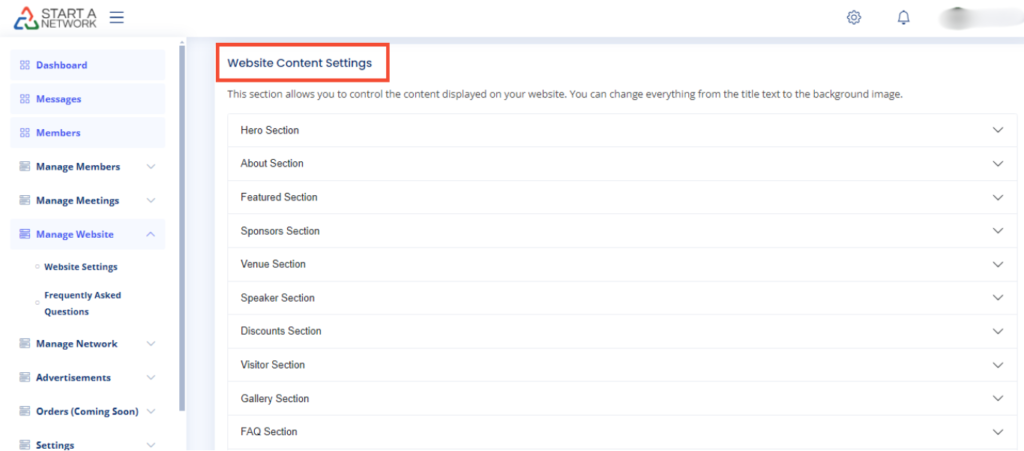
Customize the Discount Section
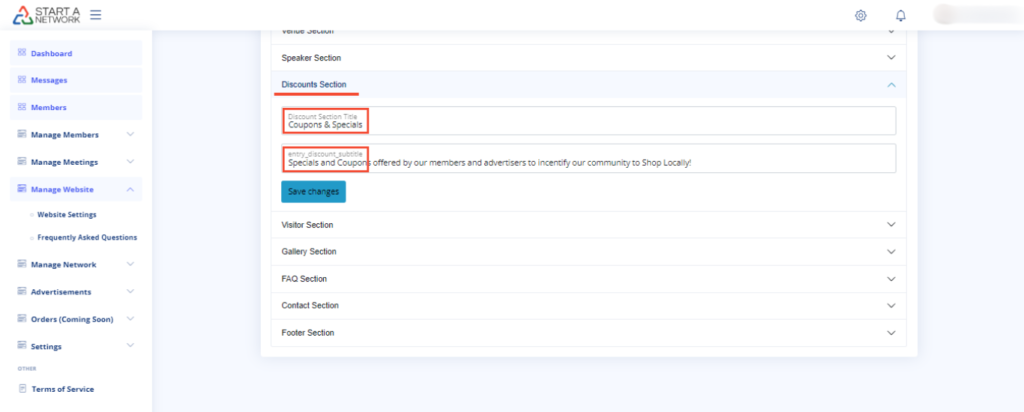
- Click on the “Discount Section” to expand it.
- Customize the following fields:
- Discount Title: Enter details of available discounts (e.g., coupons, free items, etc.).
- Entry Discount Subtitle: Provide information on how users can access or use discounts.
- Click “Save Changes” to apply your updates.
Customize the Visitor Section
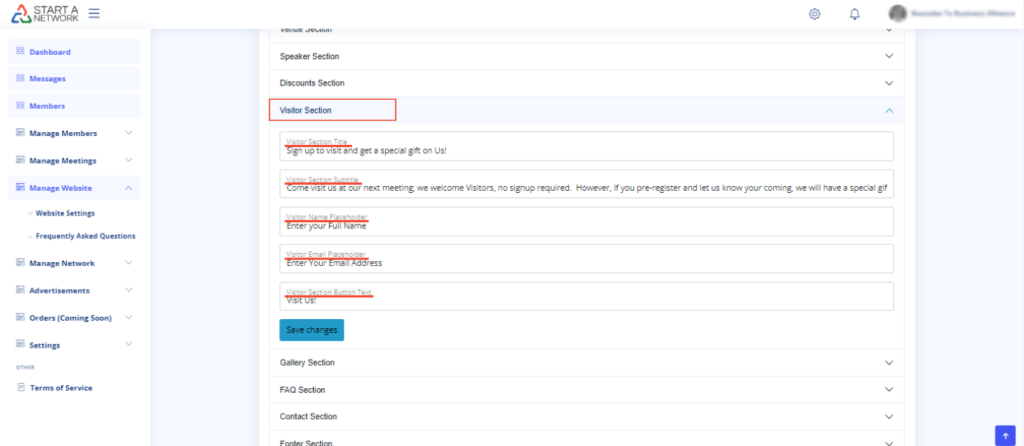
- Click on the “Visitor Section” to expand it.
- Edit the following fields:
- Visitor Title: Create an enticing header to attract visitors.
- Visitor Subtitle: Provide details about your network meetings.
- Visitor Name Placeholder: Customize the placeholder text for the full name input field.
- Visitor Email Placeholder: Customize the placeholder text for the email input field.
- Visit Button Text: Change the button text (e.g., “Visit Us” or “Join Us”).
- Click “Save Changes.”
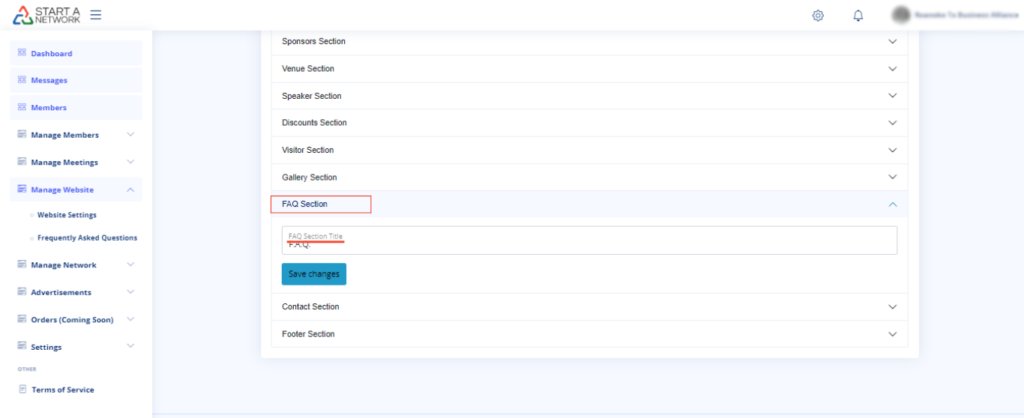
Customize the FAQ Section
- Click on the “FAQ Section” to expand it.
- Edit the FAQ Title (default is “F.A.Q.”). You can change it to “Frequently Asked Questions.”
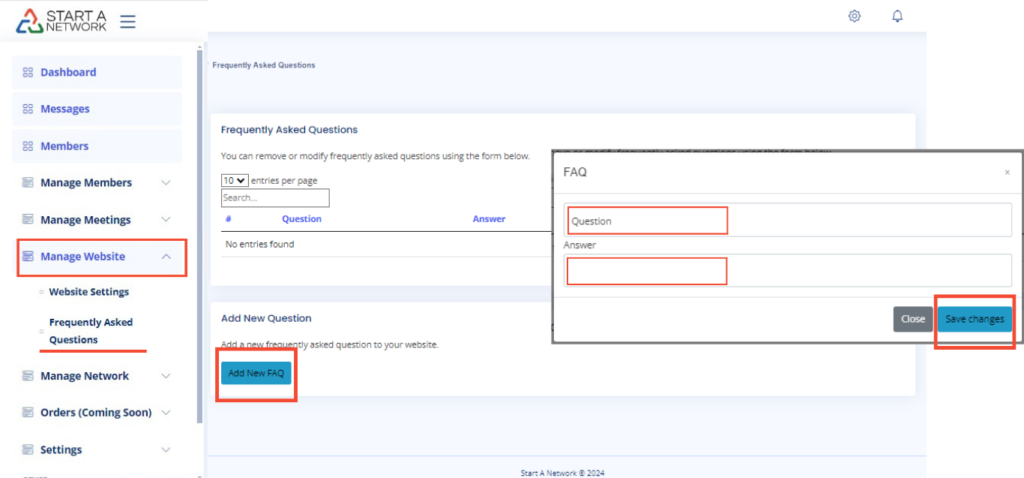
- To add FAQs:
- Navigate to “Manage Website.”
- Click on “Frequently Asked Questions.”
- Click “Add New FAQ.”
- Enter a question in the “Question” field.
- Provide an answer in the “Answer” field.
- Click “Save Changes.”
Customize the Contact Section
- Click on the “Contact Section” to expand it.
- Edit the following fields:
- Contact Title: Provide a heading for contact information.
- Contact Subtitle: Encourage users to reach out with additional questions.
- Display Detailed Contact Info: Choose whether to display detailed contact information.
- Detailed Contact Information: Enter details such as phone number, email, and address.
- Click “Save Changes.”

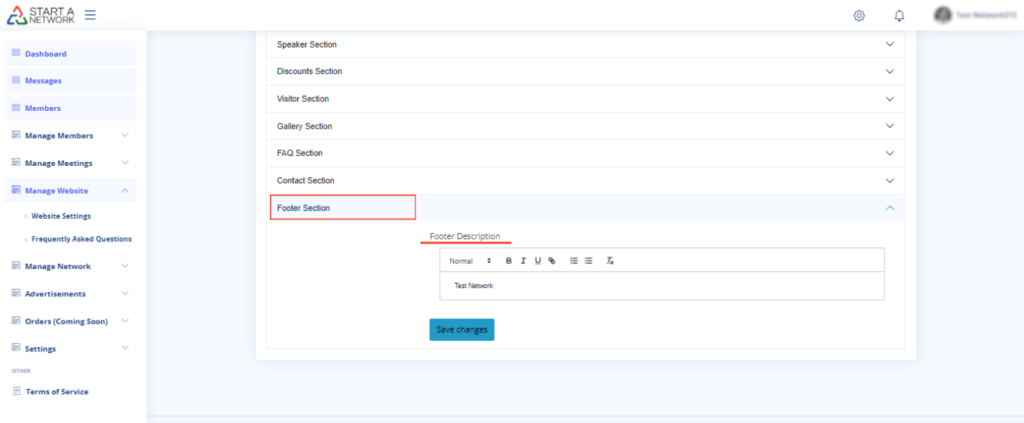
Customize the Footer Section
- Click on the “Footer Section” to expand it.
- Edit the Footer Description, which appears at the bottom-left of your website.
- Click “Save Changes.”
Confirm Your Changes
- Each time you make a change, click “Save Changes.”
- A confirmation message will appear in the upper right-hand corner of the screen.