Getting Started
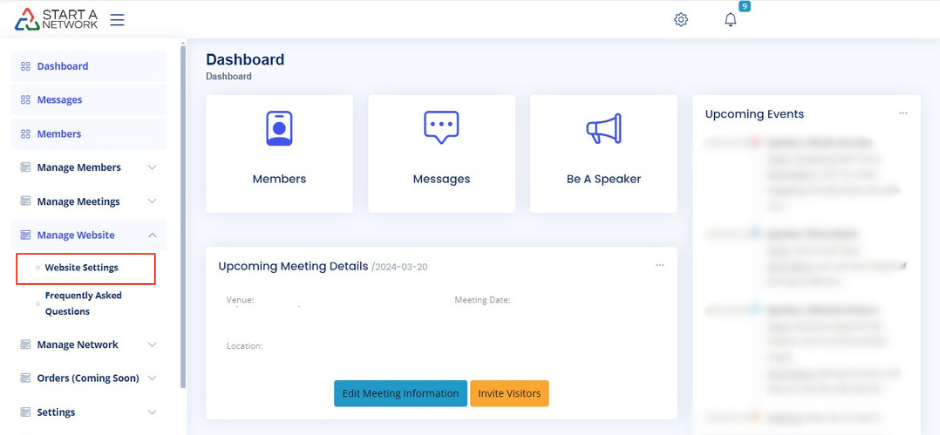
To begin, navigate to your dashboard, then expand the “Manage Website” menu on the left. Click on Website Settings and scroll down to find the Website Content section.”
There are twelve categories you can customize in total. This video will cover the first six sections: Hero, About, Featured, Sponsor, Venue, and Speaker.
Pro Tip:
Remember to click “Save Changes” after making edits in each section. You’ll see a prompt message in the upper right corner of your screen confirming that your changes were successful.
Hero Section
Let’s begin with the Hero Section, where you’ll find four customizable options:
- Hero Video URL (Optional):
If you’d like to include a video on your homepage, you can embed it here from a publicly available platform like YouTube or Vimeo. - Hero Call to Action Text:
This text will appear on the call-to-action button in the hero section. Currently, clicking this button redirects visitors to your site’s Frequently Asked Question section. - Hero Text:
If your network has a tagline or specific branding message, this is the perfect place to showcase it. - Hero Background Image:
Choose an image to display behind the text in the hero section. For best results, use a WebP image resized to 1920×1080 pixels. Make sure the image file size is under 5MB.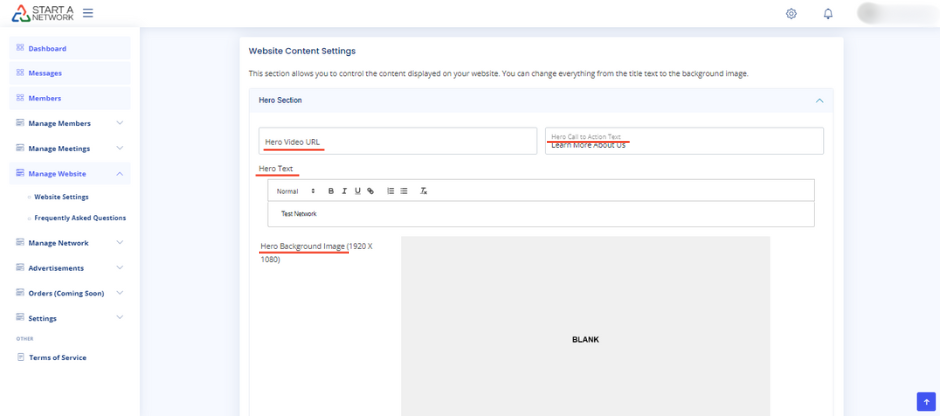
About Section
Next, let’s look at the About Section, which has three customization options:
- Title:
This is the title for this section of your website. Keep it short while clearly describing the content. - When-We-Meet-Prefix:
This lets you clarify when your meetings occur. For example, if you write “Every,” it will appear as “Every Thursday from 8 AM to 9 AM.” If you write “Every second and fourth,” it will display “Every second and fourth Thursday from 8 AM to 9 AM.” - Description:
Use this field to explain why your network exists and what the vision for your group is.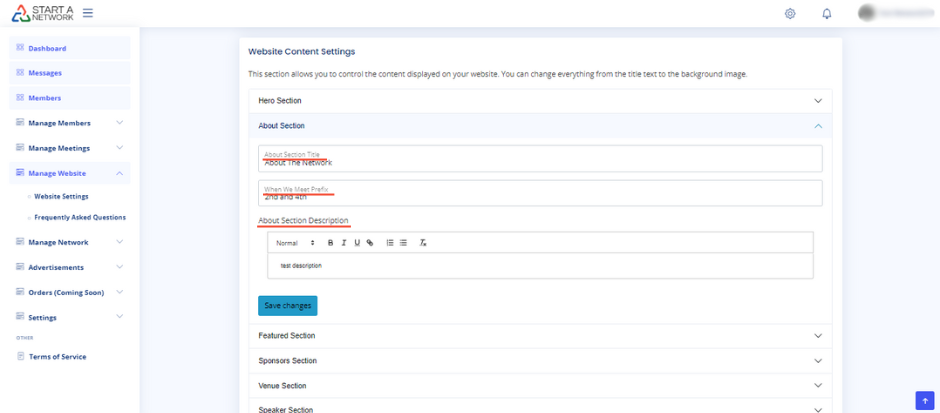
Featured Section
The Featured Section allows you to customize two items:
- Title:
This title appears above a set of profile images on your homepage. For example, if you have a martial arts network, these could be the instructors; in a school network, these might be faculty members. - Subtitle:
Use this to briefly describe who the featured individuals are (e.g., “Our Expert Instructors”).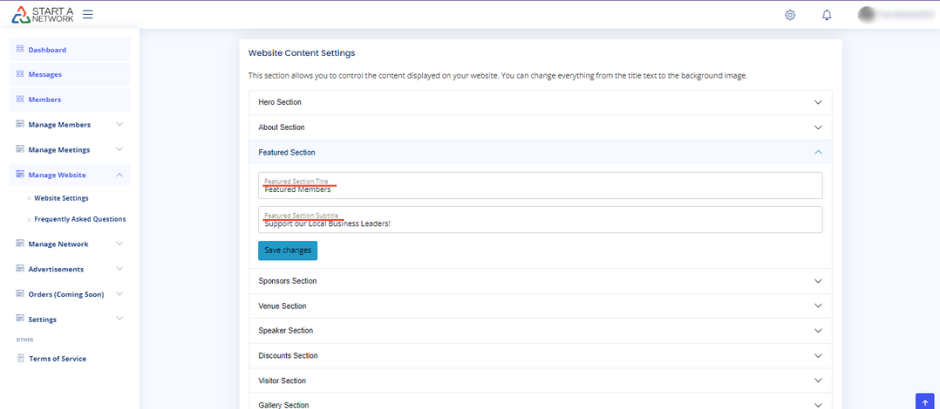
Sponsor Section
The Sponsor Section only has one option for customization:
- Title:
You can customize the title for this section. Sponsors can be businesses you want to showcase, or members who pay for a specific membership level. You could rotate members through this section, or feature businesses that support your network.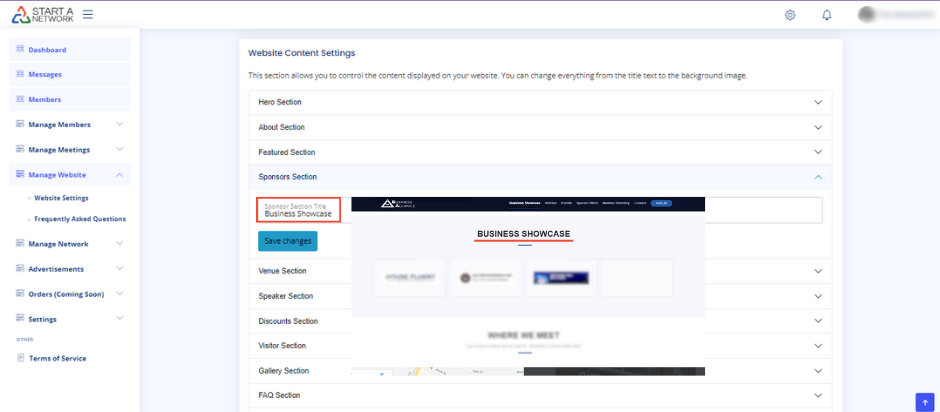
Venue Section
The Venue Section has five important options:
- Title:
This title is displayed above your venue’s information on your website. You might call this section something like “Where We Meet”. - Subtitle:
Here, you can input the address or directions to your meeting venue. - Google Map Via Embed Code:
Embed a map of your venue. To do this, search for your venue on Google Maps, click Share, then choose Embed a Map to copy the embed code. Paste it into this field to show the map directly on your site. - Venue Description:
Use this field to describe your venue and provide more detailed instructions. This could include helpful information about the venue’s ambiance, any amenities, or special rules for attendees. - Venue Background Image:
Upload an image that showcases your venue’s ambiance. Resize the image to 610×458 pixels for the best fit.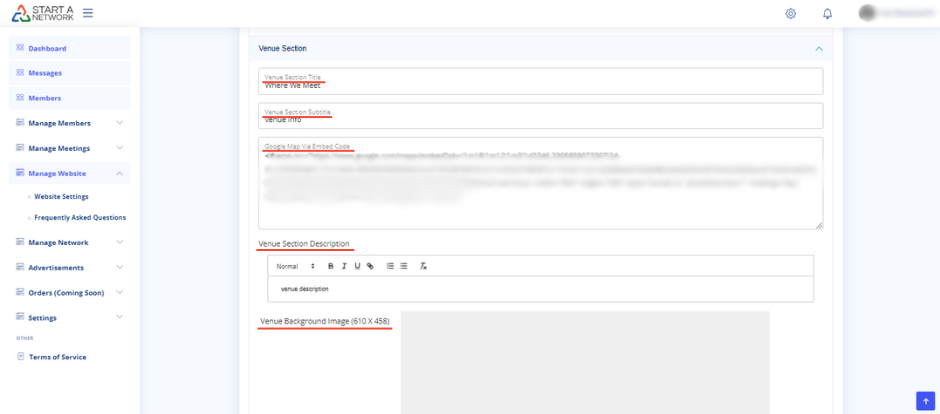
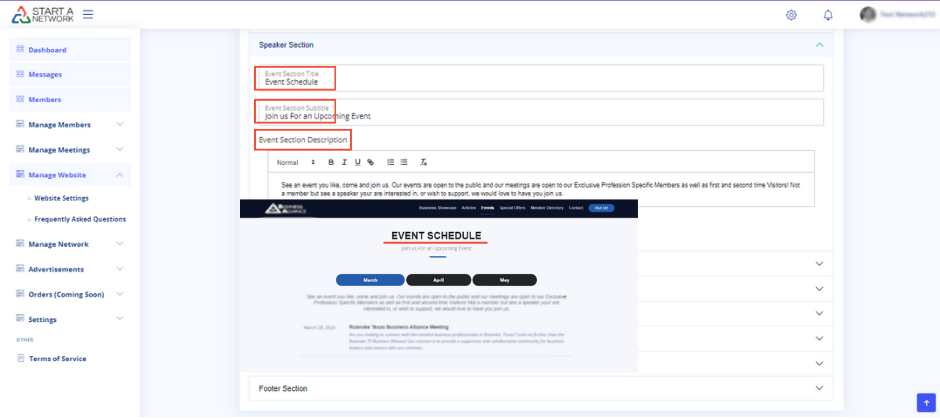
Speaker Section (Renamed to “Events”)
Finally, the Speaker Section has been renamed to Events and helps you share information about your meetings:
- Title:
You can customize the title of this section to something like “Events” or “Meetings”. - Subtitle:
Use this to provide additional information about your events. This can be slightly longer than the title and will appear below it. - Description:
This section allows you to give detailed information about your meetings or events.